
Matt Miller has taught for more than a decade, integrating technology to engage students and create unique learning experiences. He created the Ditch That Textbook blog, is a Google Certified Innovator and co-hosts a podcast called the Google Teacher Tribe podcast.
 Matt’s book, Ditch That Textbook, is all about upgrading your classroom with powerful technology and innovative mindsets to meet students in the 21st-century world where they live.
Buy a copy of Ditch That Textbook on Amazon, or don’t wait — get a copy from Matt for $20, cheaper than the Amazon price. He’ll sign it and throw in a Ditch That Textbook laptop sticker for free!
Matt travels around the United States to present at schools, workshops, conferences or any other professional development event. Ask him about it in person or email him at matt@DitchThatTextbook.com.
For more information about Matt, visit the About page. For more information about Matt’s presentations, visit the Work With Matt page.
101 Practical Ways to Ditch That Textbook: Get Matt’s free ebook with lots of great ideas (including two FULL pages of Google stuff!). Sign up for his e-mail updates in the right sidebar of this page.
Using Google Classroom more effectively and efficiently: Get this free ebook full of practical tips and ideas for using Google Classroom to the max.
1. Sort your classes, units or lessons with topics. Do you feel like all the assignments, announcements and questions in your Classroom are too unorganized? Tag them with topics and you can filter and sort them to create some order!
Create topics by clicking “Add topic” in the topics window in your Classroom stream … or create a new topic when making a new assignment, announcement or question.
Click on an individual topic to see ONLY the posts in that topic.

2. Set up the “About” tab.
3. Start posting to your classroom.
4. Assign activities with precision.

5. Provide feedback with comments.

6. Use some tips and tricks to make life easier and better.

7. Share to Classroom with the Google Chrome extension. If you find an article or webpage you want to share in Classroom, you can add it with a single click. Install the Share to Classroom extension for the Google Chrome web browser first. It will create a little Google Classroom icon in the top right corner of your Chrome browser.
When you’re on a page you want to share to Classroom, click on that icon.

8. Reuse posts. Do you create the same kinds of posts over and over? Don’t re-create them from scratch each time! Use the “reuse post” option.

9. Use move to top to bring important older material back to students’ attention. This simple act bumps an assignment, announcement or question to the top of the class stream. Use this if students haven’t turned an assignment in OR if you want to remind them of an upcoming deadline.
10. Email everyone in a class in the “Students” tab. Once you click the “Students” tab, click the checkbox above all of your students to highlight everyone. Click “Actions” and “Email.” This is great for calling special attention to something you want to communicate to students OR for longer-form communication.
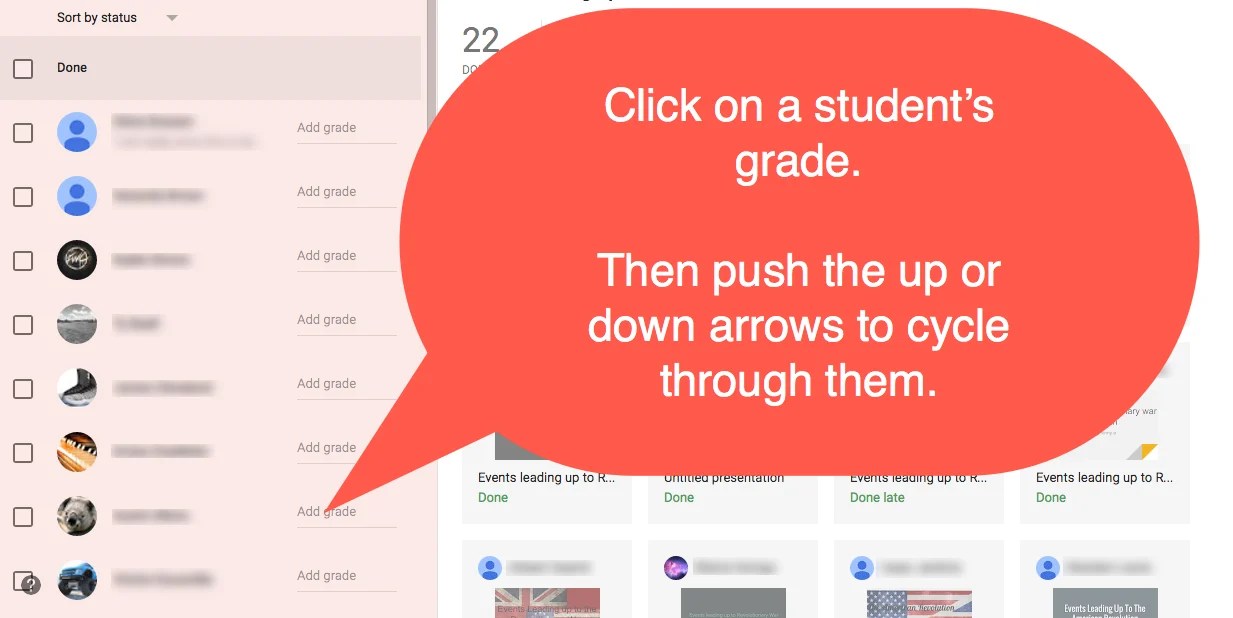
11. Save time by using the keyboard instead of the mouse. Keeping your fingers on the keyboard can save you seconds each time you do many things on Classroom, and those seconds add up quickly!
For example: When entering grades, once you’ve clicked on one student’s grade, you can push the up and down arrows to move to students’ grades up and down the list. This is SO much faster than clicking and typing.
Other keyboard commands: Tab can move through links and text fields on the page. The space bar works like a mouse click.
Of course, don’t forget the basics: Ctrl+C = copy, Ctrl+X = cut, Ctrl+V = paste, Ctrl+Z = undo. Another favorite: Ctrl+K = add a link. (Use Command instead of Ctrl on a Mac.)
Not all keyboard commands are faster than clicking with a mouse, but you can definitely find some that save you time
12. Search for student work in Google Drive. Digging files out of assignments in Google Classroom isn’t the only way to open and review student work. Files that students turn in to you are saved in a folder in your Google Drive called “Classroom.” They’re sorted by class and by assignment, too. You can always find those files by opening the subfolders in Drive. You can also use the search bar to search for a specific student name or assignment name.

13. Get ideas from others. Educators that are already using Google Classroom hang out in lots of online communities where you can read their posts and ask questions. Here are some suggestions:
14. Get the features you really want in Classroom. Do you have a suggestion for a new Google Classroom feature? Is there something you can do but wish you could do it easier? This type of feedback is what the Google Classroom team craves from teachers. Click the “?” button in the bottom left of the screen and choose “Send Feedback.” According to the Google Classroom team member that talked to my Google Teacher Academy group in December 2014, someone from their team reads every single feedback item sent that way. It’s how they’ve made many of the important feature changes to Google Classroom. And the more popular a feature request, the more likely it’ll be implemented. So send feedback and send it often!
Google Classroom posts on Ditch That Textbook:
 Alice Keeler’s website: http://www.alicekeeler.com/teachertech/
Some of Alice Keeler’s best Google Classroom tips:
Session expired
Please log in again. The login page will open in a new tab. After logging in you can close it and return to this page.