
PDFs. Long documents. Websites and articles.
A lot of teaching and learning is focused on reading them ... synthesizing them ... remembering them ... and creating something with them.
Sometimes, the sheer number of words in these dense resources keep us from even diving in -- or finding the quick answer that we need.
That's where Google's Notebook LM comes in. It becomes an instant expert on the documents you give it.
And it's FREE.
It'll answer questions. It'll summarize. It'll create new simplified resources based on the original source.
Plus, it will create podcast-style audio overviews, video overviews, slides, infographics and more!
NotebookLM can be a fantastic lesson planning assistant for teachers.
And, if used appropriately by students, it could be a great way to reinforce learning and to study.
In this post, I'll describe what NotebookLM is and share 10 important things to know for educators and students.
(And while you're at it, try lots of our free Ditch That Textbook templates.)
What is NotebookLM?
Google's NotebookLM (http://notebooklm.google) summarizes the sources that you provide. It turns them into text -- and even audio! -- resources to help you understand it better. Google calls it "your personalized AI research assistant." Click "Try NotebookLM" to open it and see all of your notebooks.

Once you're in, you can browse featured notebooks -- notebooks created by Google with pre-loaded sources. You can load your own notebooks, or you can create a new notebook.
These plans / pricing tiers are based on your overall Google subscription level. (This isn't the subscription cost just for NotebookLM; it's the cost for the Google account tier.)
- Standard (free) version: 100 notebooks, 50 sources per notebook, 500,000 words per source, 50 chat queries per day, 3 audio generations per day, 10 deep research sessions per month
- Plus ($20/mo) version: 500 notebooks, 100 sources per notebook, 500 chat queries per day, 20 audio generations per day, 20 deep research sessions per day
- Pro ($50/mo) version: 500 notebooks, 300 sources per notebook, 500 chat queries per day, 20 audio generations per day, 20 deep research sessions per day
- Ultra ($250/mo) version: 500 notebooks, 600 sources per notebook, 5,000 chat queries per day, 200 audio generations per day, 200 deep research sessions per day
You might have the "plus (paid) version" in your school Google domain already! Just go to notebooklm.google while logged into your school account.
1. Upload a variety of sources for NotebookLM to use.
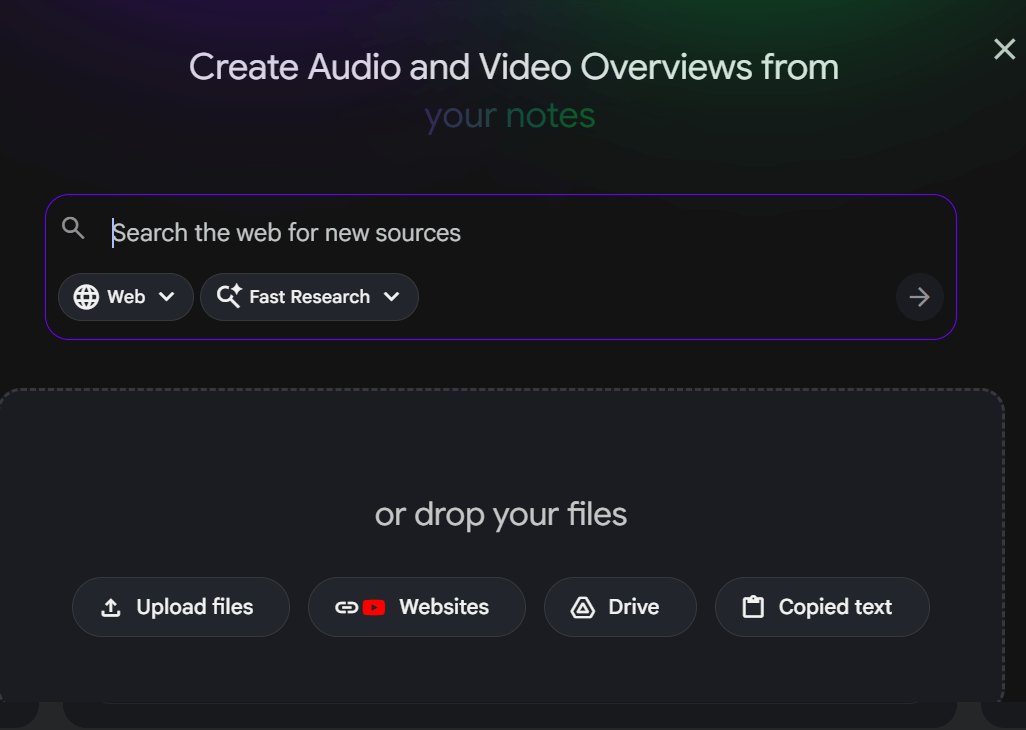
You can use ...
- websites
- PDF files
- links to websites
- any text you've copied
- Google Docs and Slides
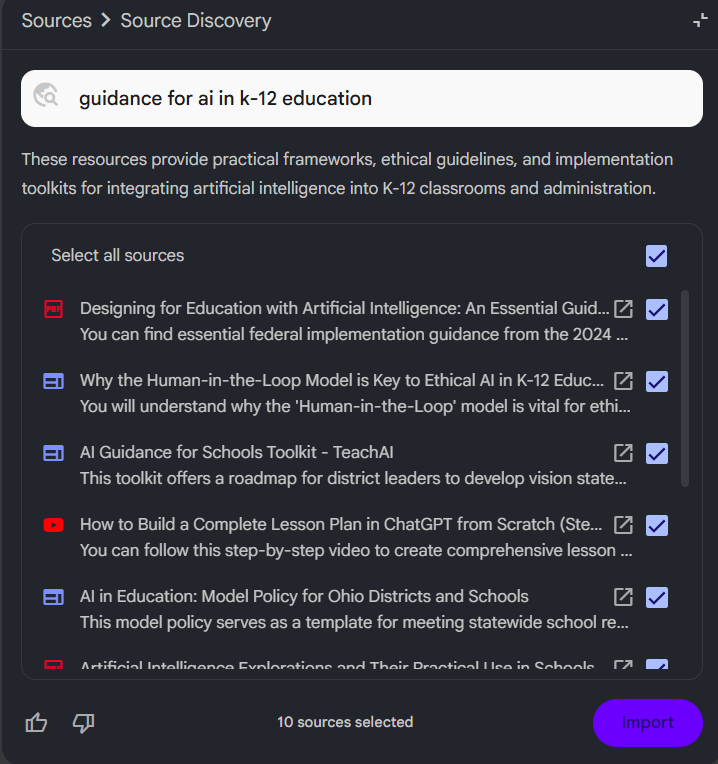
Plus, now you can use the search bar to search the web -- or items in your Google Drive. And you can use fast research (to get quick results) or opt for deep research (for an in-depth report and results). There are limits to the number of deep research tasks you can do based on your plan.
Note: If you have NotebookLM find sources for you -- and you don't check over them -- you lose some control over what NotebookLM will say and the information it will use. I have used sources from a search in the past and have been unhappy with the results because it's like pulling from random internet sources that I didn't vet.
You can choose what you want to include -- and uncheck the ones you don't want to include.
2. Chat with your sources.
Next to the sources window is the chat. The chat is like having a conversation with an expert about your sources. You can ask it for anything. Here's just a quick brainstorm ...
- Ask it for answers to quick questions.
- Ask it to summarize, prioritize, or rank.
- Ask it to identify gaps or missing elements.
- Ask it for next steps.

The chat box (where you type your question or prompt) will suggest questions you might want to ask. You can click on those -- or just type your own questions.
Here's what's really nice about the chat. It displays answers to your questions (on the right side in the image below) ... but it also footnotes the responses. If you click on a footnote, you'll see the source where it pulled the information -- and you can click the footnote to see it in context.

3. Create resources in the Studio.
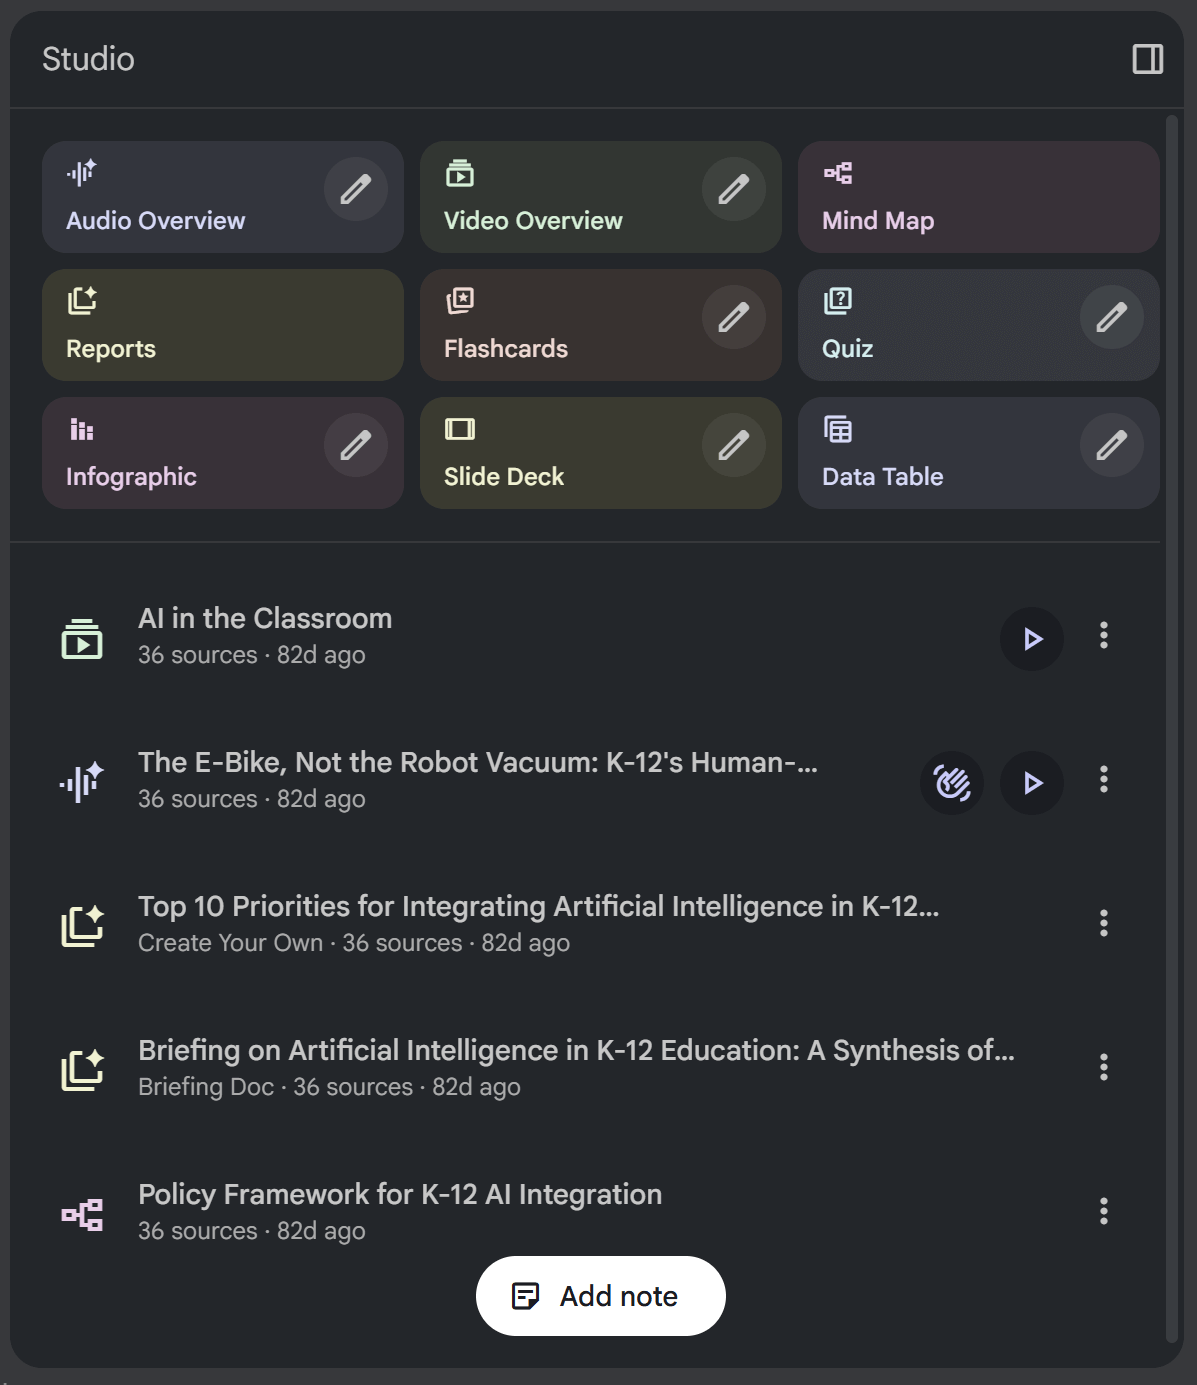
This is where NotebookLM gets REALLY incredible. It can use your sources to create:
- audio overviews (like custom podcasts about your sources)
- video overviews (like slide deck videos with voiceover)
- mind maps (expandable custom-created word webs about your sources)
- reports (briefing docs, study guides, FAQs, or timelines)
- flashcards (terms, info, and definitions for studying)
- quizzes (questions to answer based on your sources)
- infographics (gorgeous verbal/visual graphics custom created from your sources)
- slide decks (presentation slides to download or display straight from NotebookLM)
- data tables (Excel spreadsheet-style tables with your data sorted)
Let's take a look at each one ...
Studio resource #1: Audio overviews
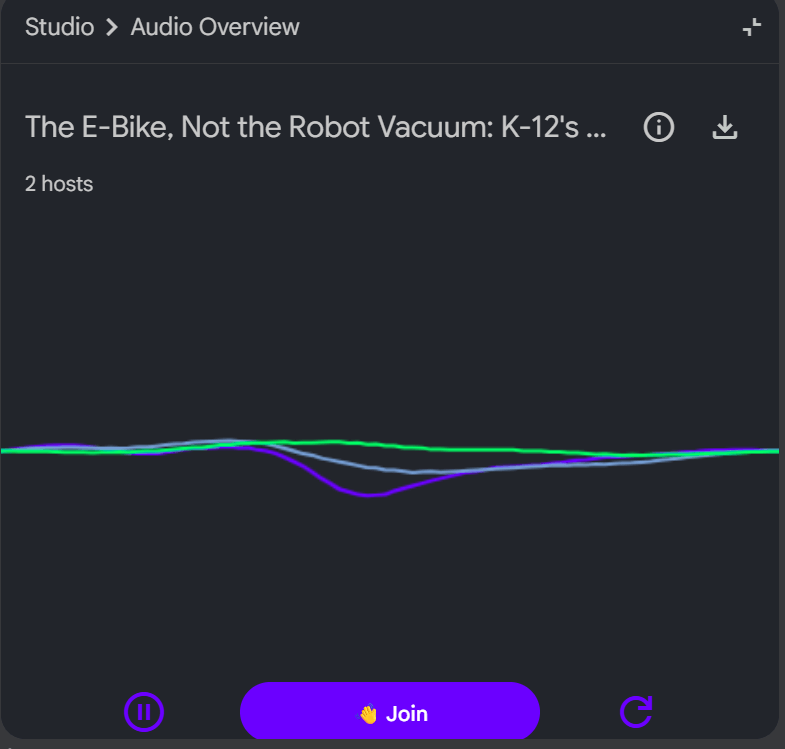
When you create an audio overview, it sounds like two podcast co-hosts are having an organic conversation about your sources. It's as if you handed them all of your sources (or specific ones you've selected) and said, "Here, read through these and create a show where you discuss them and explain them in a way that's understandable."
Once you have created an audio overview, you can play it, download it as an .mp3 file, and share it as a link.
CUSTOMIZE: Want to give the hosts some guidance on what to discuss? On the audio overview button, notice the little pencil button. Click it. You can choose an audio overview type (deep dive, brief, critique, debate), the language, and the length.
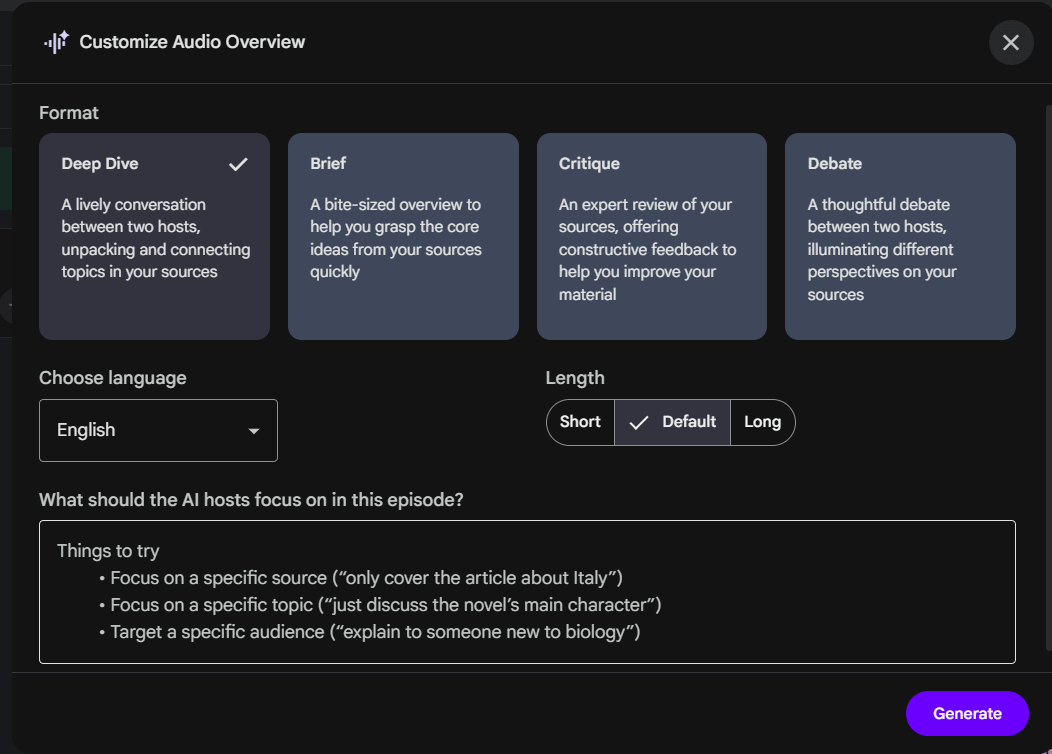
Plus, you can give it custom instructions on what exactly you're looking for (or what to avoid). Think of it like this: the audio overview hosts are getting ready to record a show, but beforehand, you slip them a little sheet of paper asking them to do a few special things for you. That could include focusing on a specific source, a specific topic, a specific audience. You can also ask it to include something special, like the name of someone who's going to be listening.
It gets really interesting when you enter Interactive Mode.

INTERACTIVE MODE: In Interactive Mode, you can play the audio overview like usual ... but there's a "Join" button. Click "Join" to ask the hosts a question. They'll stop their conversation and listen to your question ... and then respond to it ... then return back to their discussion.
ADD TO YOUR LEARNING MANAGEMENT SYSTEM: It's easy to download the audio and throw it into your learning management system (LMS) like Google Classroom, Canvas, Schoology, or Microsoft Teams. Just click the three dots next to the audio overview and choose "download." Then add the audio file directly to your LMS -- or add it to your Google Drive or Microsoft OneDrive and then link to it in your LMS. This makes creating these resources and sharing them with your students quick and easy.
Studio resource #2: Video overview

NotebookLM won't just create a podcast episode for you to listen to.
It'll create a video -- complete with a voiceover and a set of slides -- all wrapped into a polished, finished video file. Play it. Change the playback speed. Full screen it. Download it. Or share it as a link.
If you click the pencil to customize: You can choose the format (explainer video or brief video), the language, and the visual style. Plus, you can ask it to focus on something specific to customize the video.
ADD TO YOUR LEARNING MANAGEMENT SYSTEM: It's easy to download the video and throw it into your learning management system (LMS) like Google Classroom, Canvas, Schoology, or Microsoft Teams. Just click the three dots next to the audio overview and choose "download." Then add the audio file directly to your LMS -- or add it to your Google Drive or Microsoft OneDrive and then link to it in your LMS. This makes creating these resources and sharing them with your students quick and easy.
Studio resource #3: Mind maps

NotebookLM will analyze your sources and turn them into an organized mind map to help you see how topics are connected and interrelated. It's fascinating to see how NotebookLM organizes and sorts out the content in your sources.
Each mind map includes collapsable and expandable sections. Zoom in and out. Collapse and expand. Download it exactly as you have it zoomed in our out as an image file.
FIND MIND MAP MATERIAL IN A SOURCE: If you click on any part of the mind map, it displays where it found that information in your source. This is really helpful if you have lots of sources and you want to drill down to a particular part in one source quickly.
Studio resource #4: Reports

When you create a report in NotebookLM, you can choose from the four pre-created report types:
- Briefing doc (detailed executive summary of the material in outline format)
- Study guide (outline, quiz with answer key, essay questions, glossary of key terms)
- FAQ (commonly expected questions -- with answers)
- Timeline (important information organized by dates/times from the source material)
These reports are view-only, so you can't really download them as documents or share them as links. However, you can easily copy/paste the text into a document and do whatever you want with it from there.
Studio resource #5: Flashcards
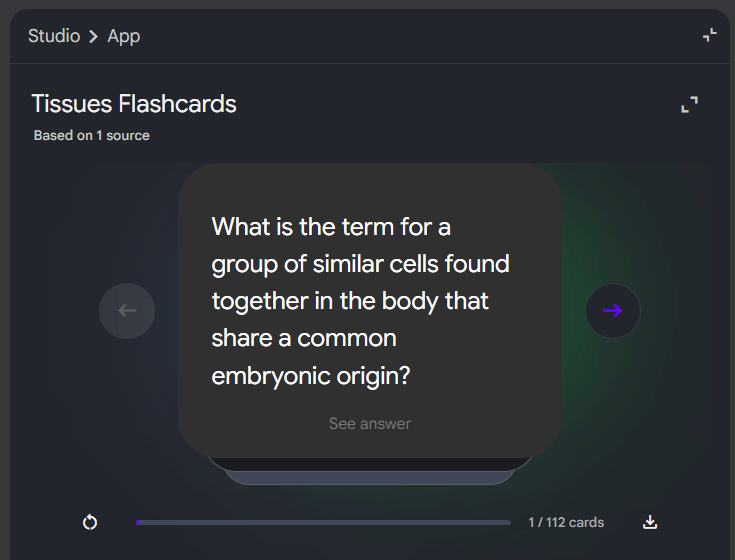
NotebookLM will create flashcards based on your sources. There are lots of flashcard apps out there (like Quizlet and Knowt). You can flip through flashcards directly in the NotebookLM app, which is helpful. But you can also download them as a CSV file, which lets you import them into other flashcard and study apps. It's a quick and easy way to get flashcards that are pulled directly from your exact sources.
If you click the pencil to customize: You can change the number of cards (fewer, standard, more) and level of difficulty (easy, medium, hard). You can also ask it to focus on something specific.
Studio resource #6: Quiz
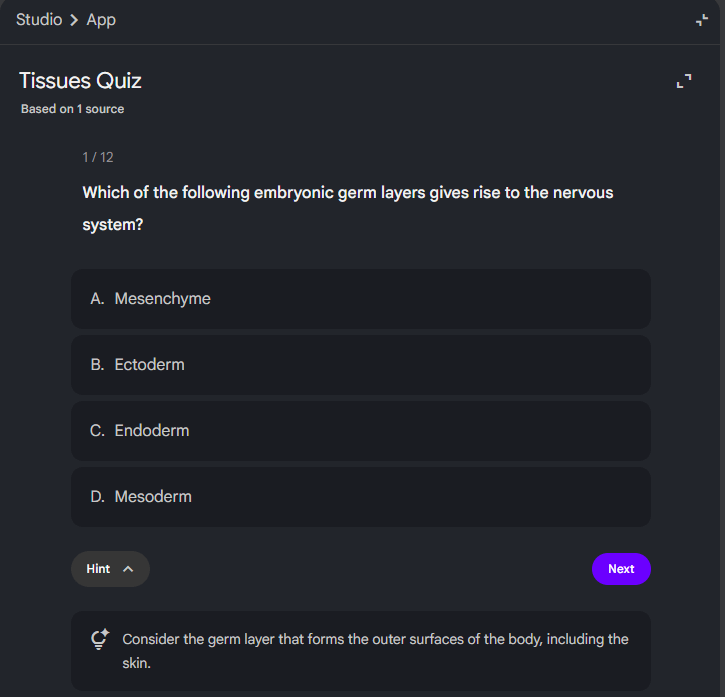
NotebookLM gives you an interactive AI-generated quiz with multiple choice questions based on the sources you provide. It even gives you a hint button, which will display a quick bit of help with the question.
When you answer the question, it explains why the right answer is the right answer -- and if you got it wrong, it explains why that's not right. Plus, there's an "Explain" button at the bottom that sends your question over the to the chat, where it explains it in more depth.
After you're done, it displays your score (which is mostly a practice activity for the student, not a formal assessment where the score is sent to the teacher). You can review the test (going back through all of your answers) and retake it.
If you click the pencil to customize: You can choose how many questions (fewer, standard, more) and the level of difficulty (easy, medium, hard). You can also ask it to focus on something specific.
Studio resource #7: Infographic
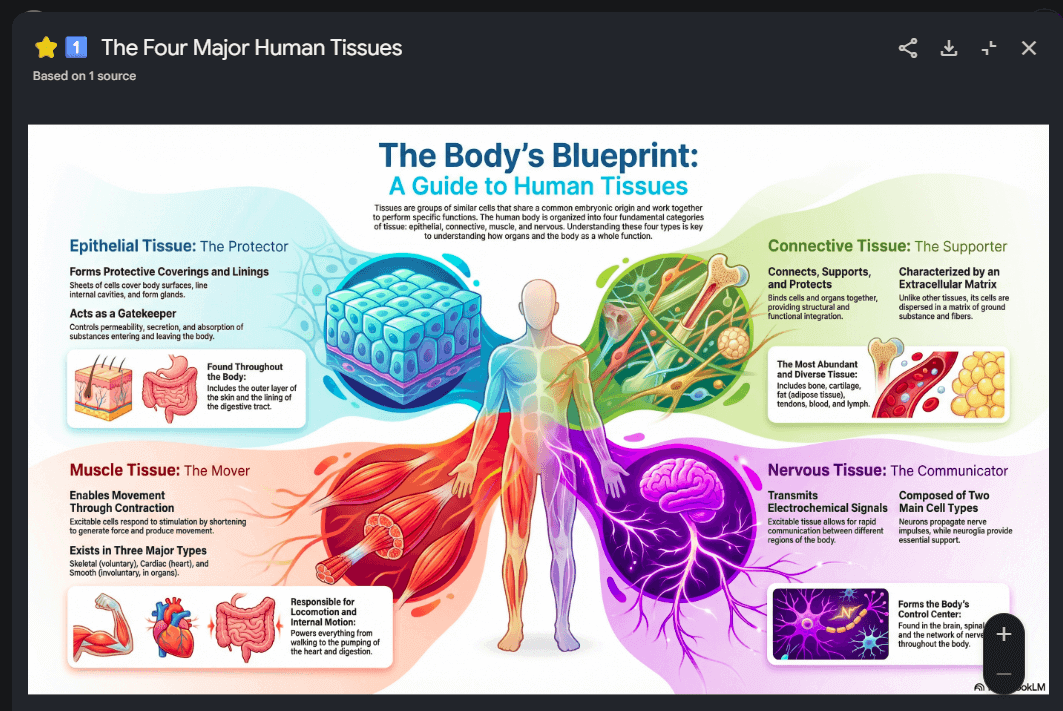
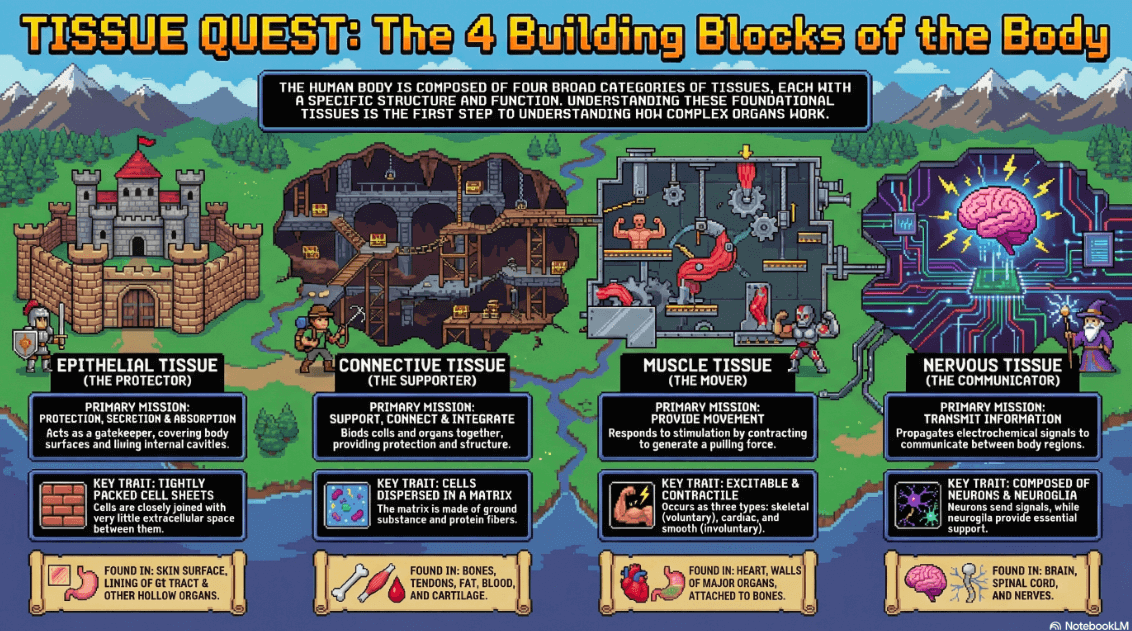
For a while, it was the audio overviews in NotebookLM that impressed me the most. Now, it's probably the infographics. NotebookLM does an incredible job summarizing the main points of the sources into a gorgeous combination of images and text. As the AI models have improved, it has done a better and better job at generating text (even though the original AI image generators weren't really made to create text).
These images can be downloaded as image files and put right into your learning management system (LMS), your slides, documents to give students, or anything else.
If you click the pencil to customize: You can choose the language, the orientation (landscape, portrait, square), and the level of detail (concise, standard, detailed). You can also ask it to focus on something specific.
BONUS: Create a series of infographics. In the infographic above, it summarizes the four types of tissues. However, if you'd like more detail about any of them -- or even all four of them, then create a new infographic and ask it to focus on only muscle tissue (or nervous tissue, or whatever). Note that different Google accounts have different usage limits for NotebookLM. On my free plan, I think I maxed out around 10 infographics in one day.
BONUS: Choose a style of infographic. You can always ask it to create the infographic in any style you choose. For example, I've had fun asking it for retro 8-bit video game style. Below is what it gave me!
Studio resource #8: Slide deck
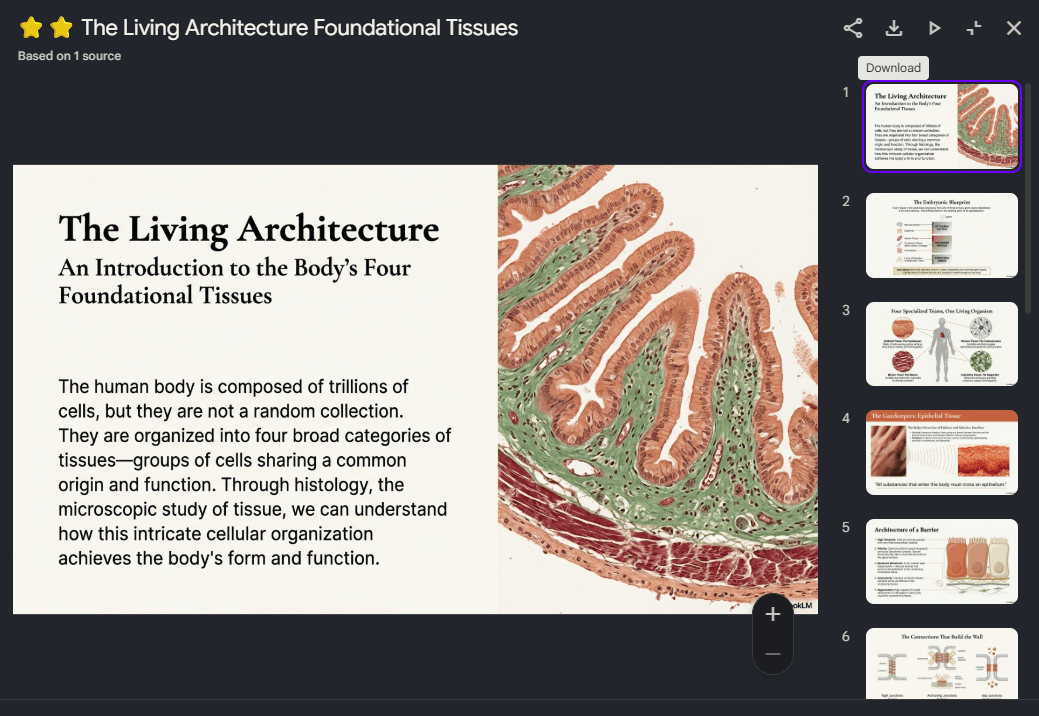
NotebookLM will create slides based out of your sources that include AI-generated images. If it gives you exactly what you're looking for, then these slides could be fantastic.
There are some things to be aware of, though ...
- You can click the "Play" button and display the slides right in the NotebookLM app.
- They are generated as a PDF file -- not a Google Slides file. You can download the file, but know that it's a PDF and not a PowerPoint file or Google Slides.
- If you have a Canva account, you can click "Create" to upload the PDF and Canva will change it into a slide presentation file. BONUS: On any slide, you can click "Edit" and use AI to adjust the slides. One of my favorites is "Magic Text," where it will identify text and change it to editable text.
If you click the pencil to customize: You can choose the format (detailed deck or presenter slides), the language, and the length (short or default). You can also ask it to focus on something specific.
Studio resource #9: Data table
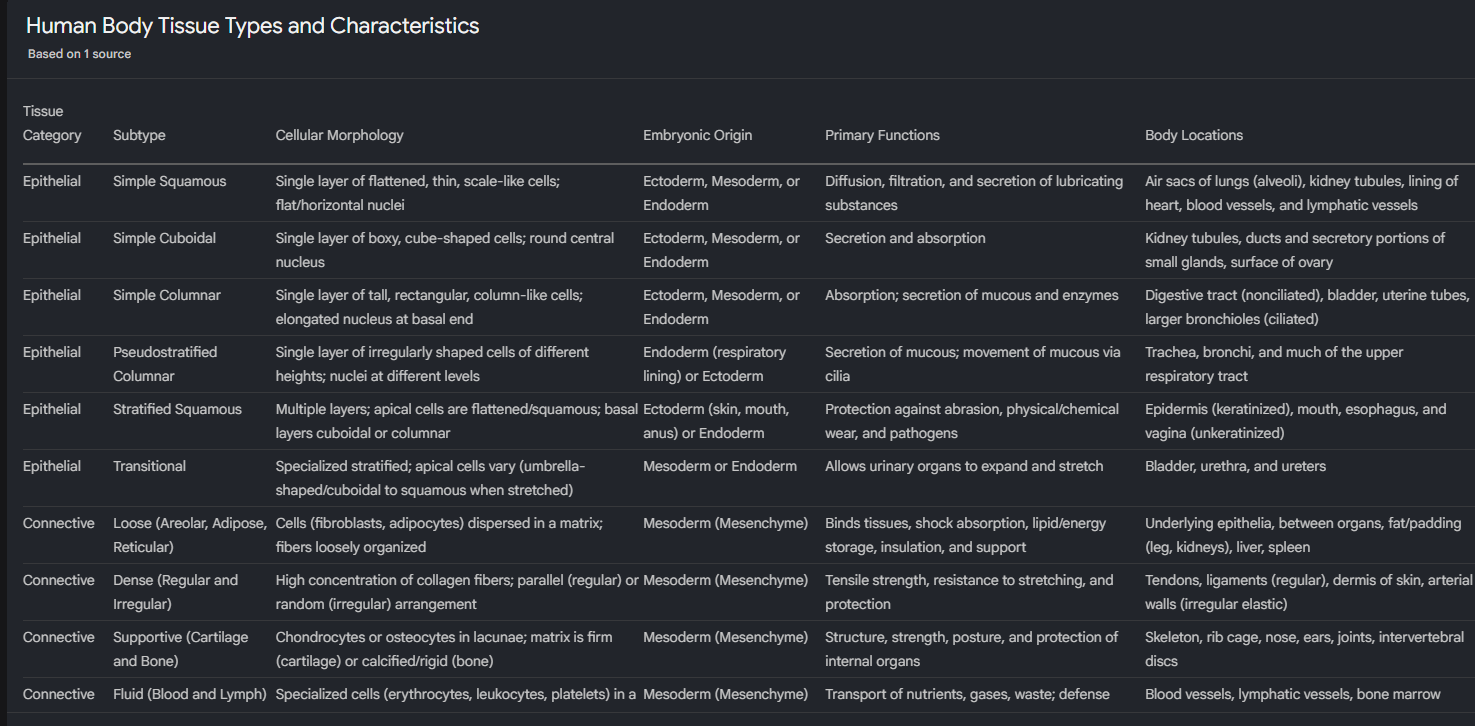
Spreadsheet fans, rejoice! NotebookLM will analyze your sources and turn them into a table. It will sort everything into columns and rows. This is really, really helpful for certain sources -- and a little forced and unnecessary for some sources.
You can export the table directly to Google Sheets by clicking the Google Sheets button.
If you click the pencil to customize: You can choose the language and ask it to focus on something specific.
10 important things about NotebookLM for educators and students
1. Students can now use NotebookLM.
According to Google's help page, NotebookLM is available to all users 13+ through the browser (regardless if they're using it through a Workspace for Education organization). Content policies are stricter for users under 18 years old.
NotebookLM is available to users of all ages with a Workspace for Education account -- even for students.
Here's more info about using NotebookLM with a school Google account.
Also important to note: Google says NotebookLM won't use your personal data to train its AI models. If you're an enterprise (paid) user or an EDU user, it won't use your uploads or queries -- or the model's responses -- to train AI models (and they won't be reviewed by human reviewers).
2. Audio summary?? WOW. Use it to reinforce and summarize.
The audio summary feature is INCREDIBLE. It turns your source materials into a podcast-style interview you can listen to.
The audio summary can be a FANTASTIC way to review and reinforce, though. Students could listen to it during a commute or while doing any sort of routine task. Or, as a teacher, this could be a MUCH less painful way to get acquainted with a long document.
3. Create audio summaries and share them with students through Google Drive.
If you love this audio summary feature as much as me, don't let terms of use stand in the way of your students benefitting from it.
- Upload sources to NotebookLM. Create an audio summary. Click the three dots and download it.
- Upload that audio summary file to Google Drive (or OneDrive or Dropbox or whatever).
- Share the audio file with students with a link -- or through your learning management system (Google Classroom, Canvas, Schoology, etc.).
Again, the audio file itself isn't subject to the terms of use ... just the use of the NotebookLM tool itself.
4. Create study guides for students -- and throw them in Quizlet.
Take your sources that students are supposed to learn from -- PDF files, documents, chapters from a textbook, etc. (You can even copy/paste the transcript of YouTube videos as a "copied text" source.
Then, under "Notebook Guide" at the bottom, choose "Study Guide." It'll create short-answer questions (with an answer key) and a glossary of important terms.
What do you do with that study guide? You might go to Quizlet (quizlet.com) and create a study guide (and related flashcards) with it.
5. NotebookLM is available in 50+ languages.
This is huge. If you want to create resources for students whose first language isn't English, you can just change the output language in the settings for the notebook in NotebookLM. (Then change it back if you want it to go back to English.)
Also, if you're teaching world languages as a subject, creating resources in the target language could be a great language learning opportunity.
6. Use this to help your human brain -- not to replace it.
Be careful. Use this as a tool just like you should with anything else powered by AI -- to accomplish what you want. If you (or your students) need to be well-acquainted with the details of the source material, don't use it to substitute your brain work.
For students, this could be a great way to reinforce and review material.
For teachers, it shouldn't be used to make decisions for us by bypassing our valuable human teacher brain.
7. Find keywords and a summary for your sources.
If you click on one of the sources you uploaded (in the top left), you'll get the "Source Guide." It summarizes your source. It gives the full text of it. Plus, it identifies key topics. Click any of the topics and it'll start a chat saying "Discuss (key topic you just clicked" to summarize that key topic based on the source.
8. Get exactly what you want from sources in the chat.
The chat answers your questions and fulfills your requests within the confines of the sources you provided.
The sky's the limit here, and you can ...
- Get answers to quick questions
- Ask what the sources don't cover (what the gaps are)
- Ask for the hardest parts to understand
- Get an explanation a 10 year old would understand
The chat is powered by Gemini 1.5 Pro, Google's most capable model (as of publication of this post). So you can do a lot more than answer simple questions and get simple summaries.
Get creative and fun with it. Here are a few I've tried:
- Ask it to write the script for a viral TikTok video about your sources.
- Ask it to create a script for the kids TV show Bluey about your sources.
- Ask it to write a haiku about your sources.
9. Rename your items in Studio to make them easier to find.
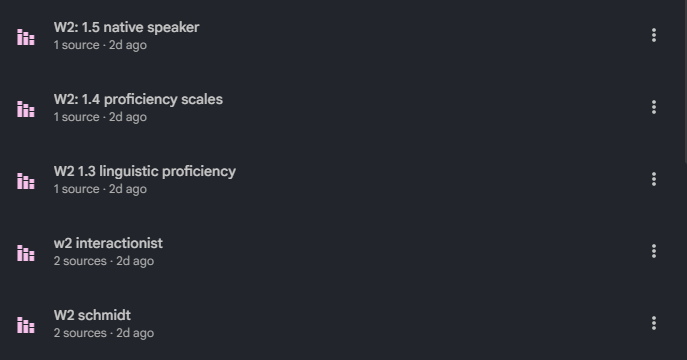
When I create something in Studio (like an audio overview or an infographic), I have started clicking the three dots button and choosing "Rename." I'll add emojis (like stars) or a short abbreviation (like W1 for week 1) so I can find what I'm looking for more quickly. Below is my notebook I'm using to take a college class. I have renamed all of my infographics so I'll know which module of the course they pertain to.
10. Share your notebooks with others (for shared lesson planning).
Notebooks are shareable! Click the "Share" button to share a notebook with an individual -- and give them viewer rights or editor rights.
Imagine this as an AI-powered collaborative lesson planning space ...
- Create a notebook for a chapter or unit you're teaching
- Upload all of the sources you'll need to it
- Share it with colleagues
- Create resources that any of your colleagues can access
- Type and create notes -- and edit resources created by NotebookLM -- to co-create plans


